
Deploying Websites Using Firebase

Following some previous guides on utilising Google Cloud, I have been working closely with Firebase on apps lately, along with deploying a number of website projects there. The below is a quick guide on how to deploy websites to Firebase.
And before you ask why - beyond the impressive infrastructure, Firebase is a natural choice for those already in the ‘Google House.’ If you rely on the Google stack, particularly for analytics and ads, Firebase offers multiple easy integrations with products like BigQuery and Analytics APIs, along with Google’s own AI tools which might come in handy as your projects grow. It is also incredibly handy for deploying quick projects internally.
Create Your Firebase Project
Before you can begin to host anything, you’ll need a Firebase project for your data and hosting. Head to the Firebase console. A few things to note here: if you already have a Google Cloud account, you can create your Firebase project in there, or alternatively if you do not have a Google Cloud account or project, creating a Firebase project will automatically create a Google Cloud account.
In the Firebase console, click Add Project and give it a name (in my example I am going to call it timhutton-firebase-blog - this will typically be the name that Firebase uses for the domain unless you want to set up Custom Domains) before clicking Continue. On the next step you can choose to enable Google Analytics for the project, this is completely optional. It will create a new Google Analytics account if you do enable this.
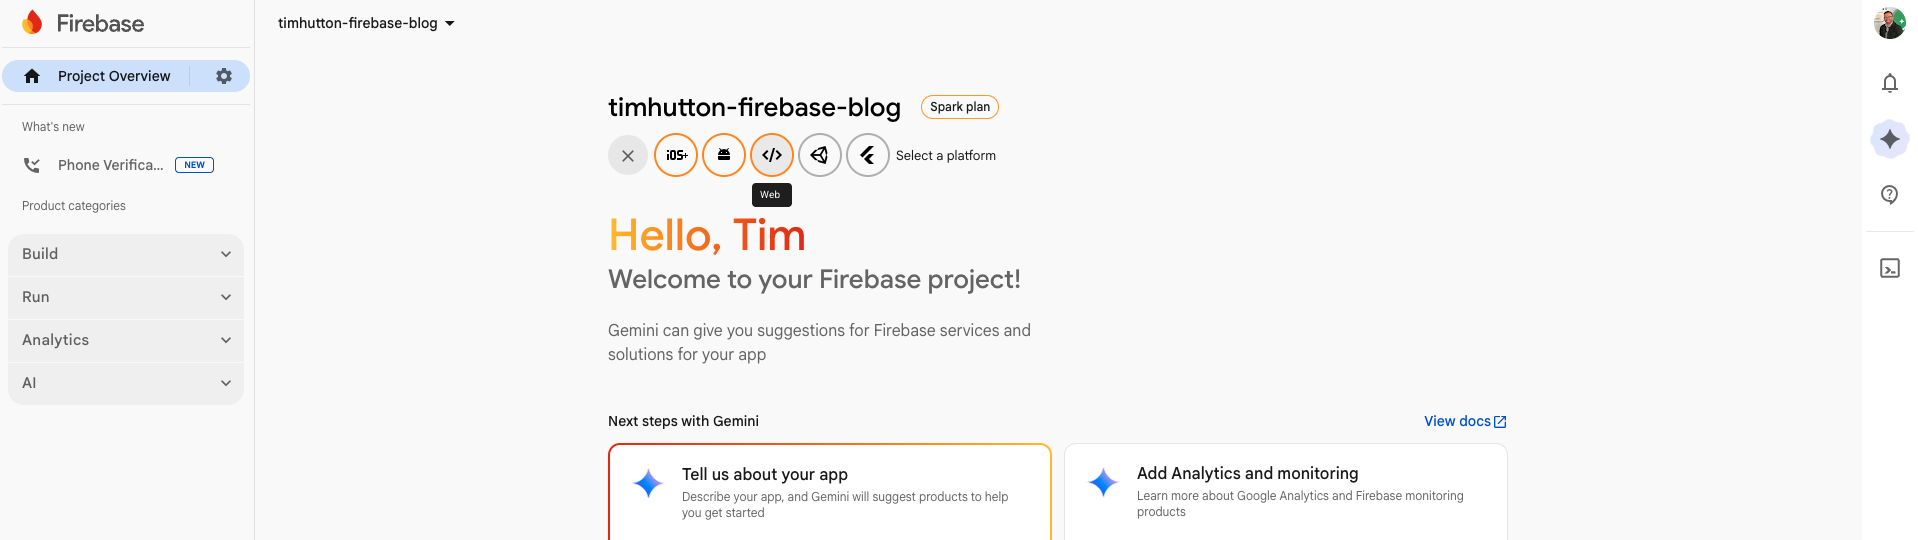
Once created, you will be taken to the Project Overview page. Click the + Add app button and then select the Web icon (</>) as shown in the image below.
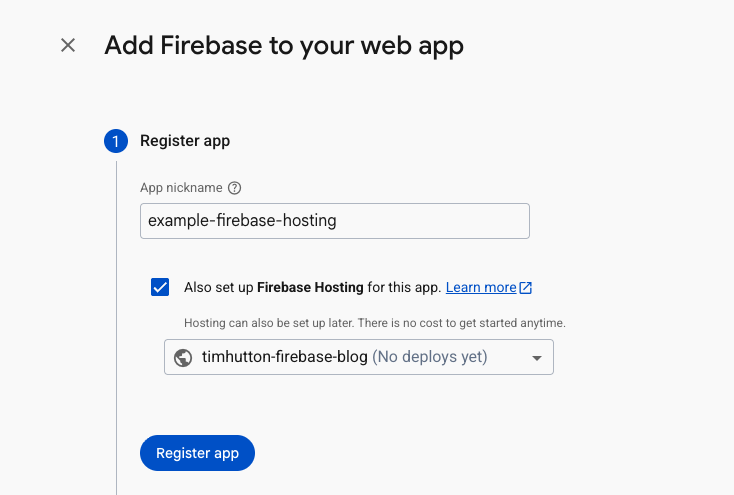
Next you will want to give your app a nickname - this is what it will be referred to within Firebase and isn’t seen by external users. Ensure you tick the checkbox that says Also set up Firebase Hosting for this app and then select your project from the drop down. Now click Register app.
Add Firebase to Your Code
You will then be taken to the next step which is Add Firebase SDK. The below example will show working on a project in Visual Studio Code, so I will use the Use npm option, however, if you do not want to use Node.js, then you can choose the Use a <script> tag option.
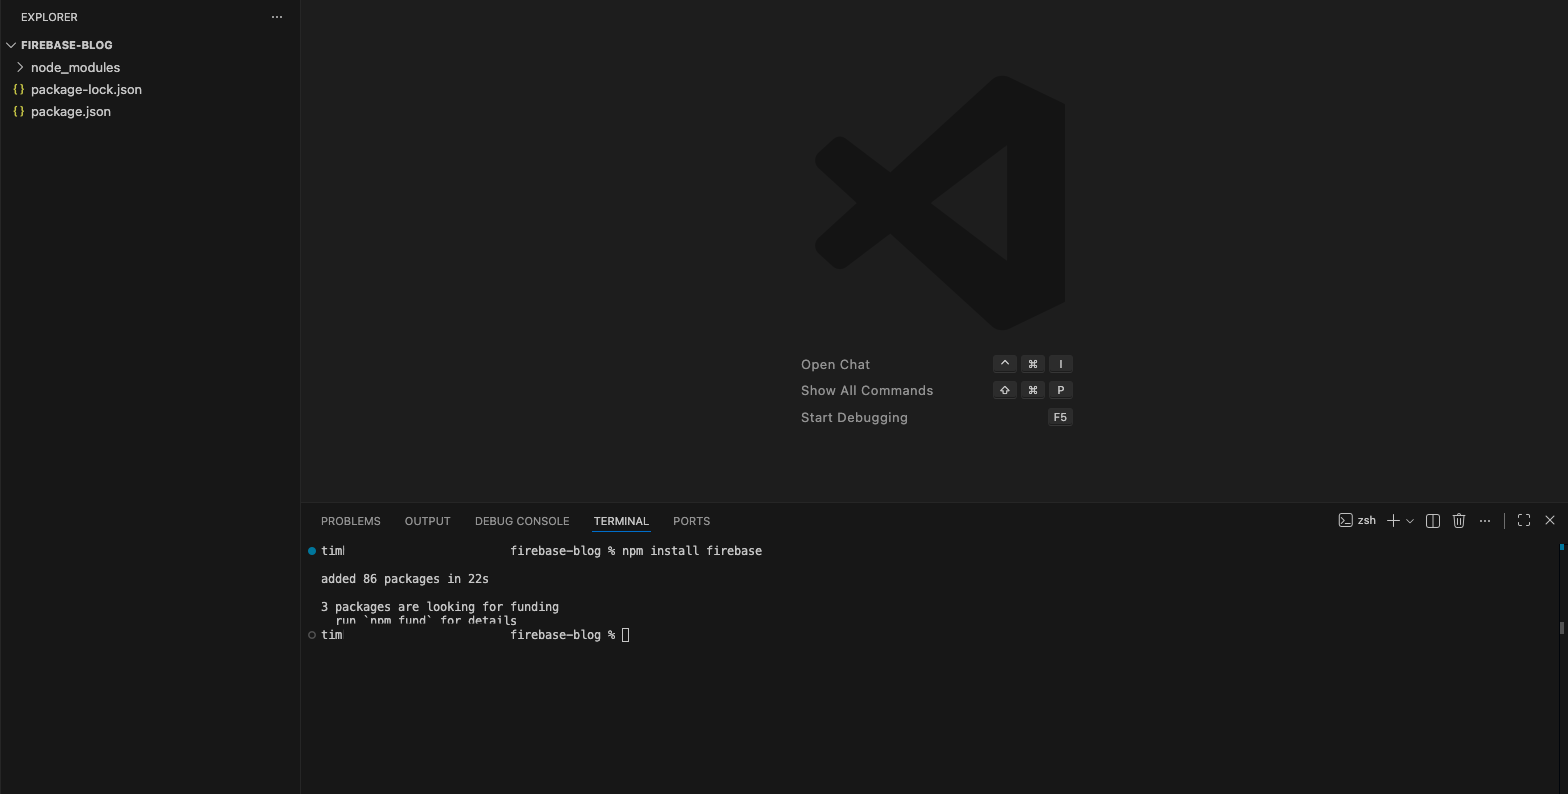
If starting from scratch, create a folder on your device and open this folder in Visual Studio Code. Now in the terminal paste the below and hit Enter.
npm install firebase
You can copy this directly from the Firebase screen. This will run and then show once it has installed packages. You will also see new files and folders in the Explorer on the left-hand side.
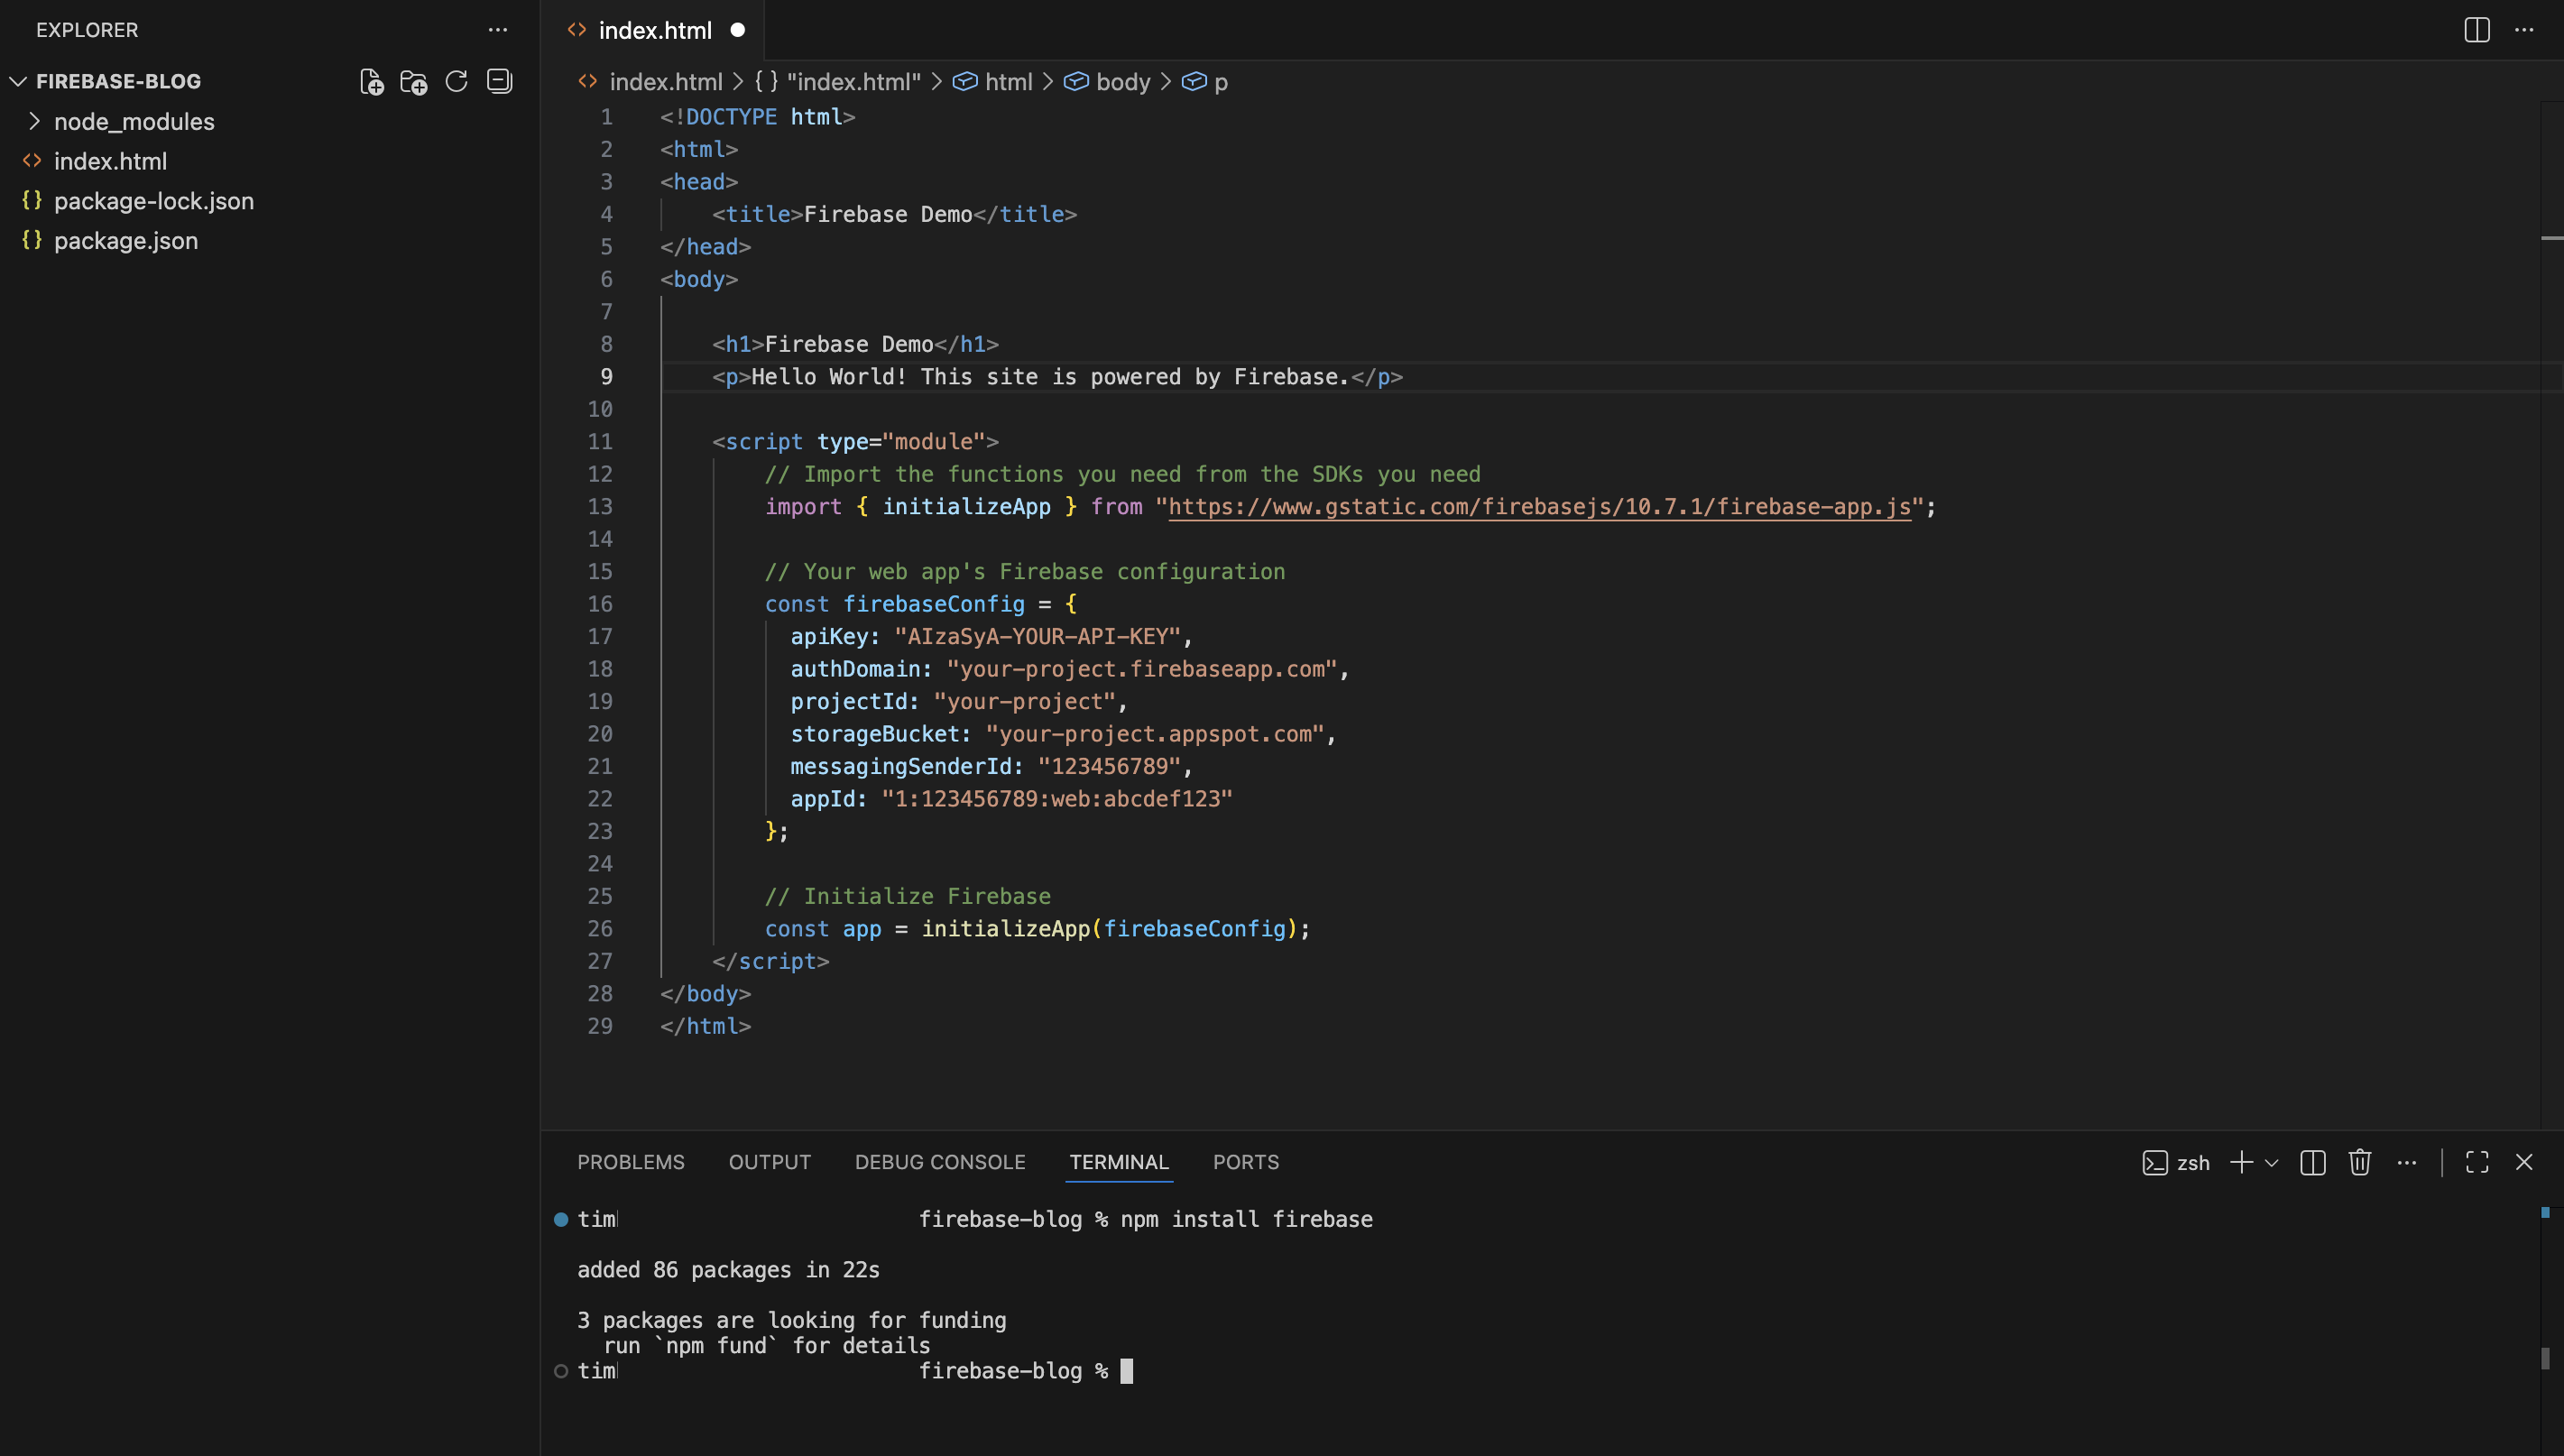
Now you can start to work on the site itself, and will need to paste the config object provided to you in Firebase, it should look something like this, obviously replaced with the correct info.
import { initializeApp } from "firebase/app";

// Your web app's Firebase configuration
const firebaseConfig = {
  apiKey: "AIzaSyA...",
  authDomain: "your-project.firebaseapp.com",
  projectId: "your-project-id",
  storageBucket: "your-project.appspot.com",
  messagingSenderId: "123456789",
  appId: "1:123456789:web:abc123def"
};

// Initialize Firebase
const app = initializeApp(firebaseConfig);
I have also included a basic screenshot below of it inside some code, again with dummy credentials. It is advisable to move these credentials into a separate file as you can then include that file in a .gitignore if you are hosting on Github.
Deploy!
The next step is where you get to see your finished (or in my case, barely started) project in the wild! There are a few steps to be achieved here but they do not take very long. You’ll first need to install the Firebase CLI (Command Line Interface). To install this, simply paste the following in the Terminal and hit Enter:
npm install -g firebase-tools
Once that is done, you will then want to paste the below. This will prompt a Google sign-in window to open in your browser. Sign in with the same Google account you used for the creation of the Firebase project.
firebase login
You’ll then need to initialise hosting with the below in the terminal and pressing Enter - make sure you do this in the project’s root folder.
firebase init hosting
You will be provided with a few options.
Firstly, for Project Setup, select Use an existing project and pick the one you created earlier. You navigate by using the Up and Down keys on your keyboard and then pressing Enter on the option you want.
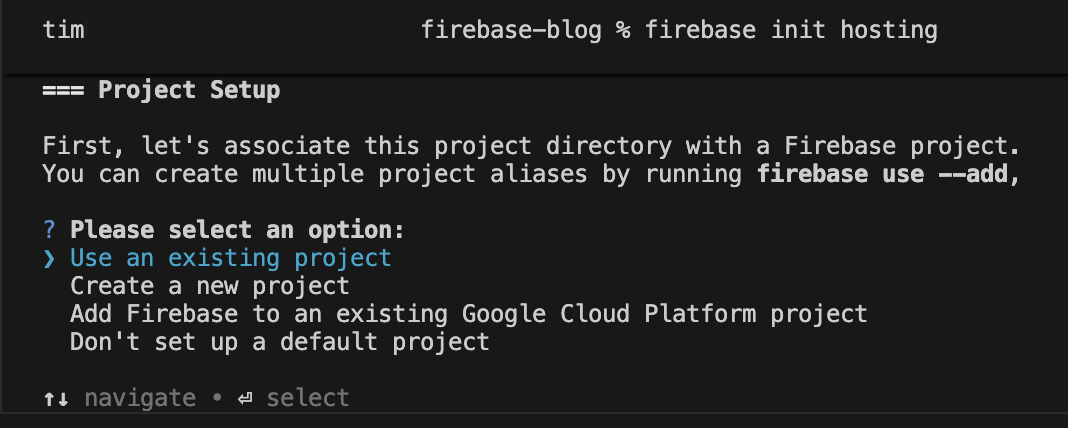
You will then be asked what you want to use as your public directory. If using a framework such as React, this is usually dist or build. For simple HTML, you can use public and simply hit Enter without typing anything, unless you want to use a specific folder.
A note that this will create a folder called public where the index.html file will be placed, so if you have already created an index.html file, you will need to move it there after this step - I have made that mistake a few times!
Finally, you will be asked about Single Page Apps. Again, if using a framework such as React or Vue, select Yes to rewriting all URLs to index.html. If using standard HTML, you can set this to No.
Once this is done, you should see Firebase initialization complete!, meaning we’re nearly there. Paste the following and hit Enter.
firebase deploy
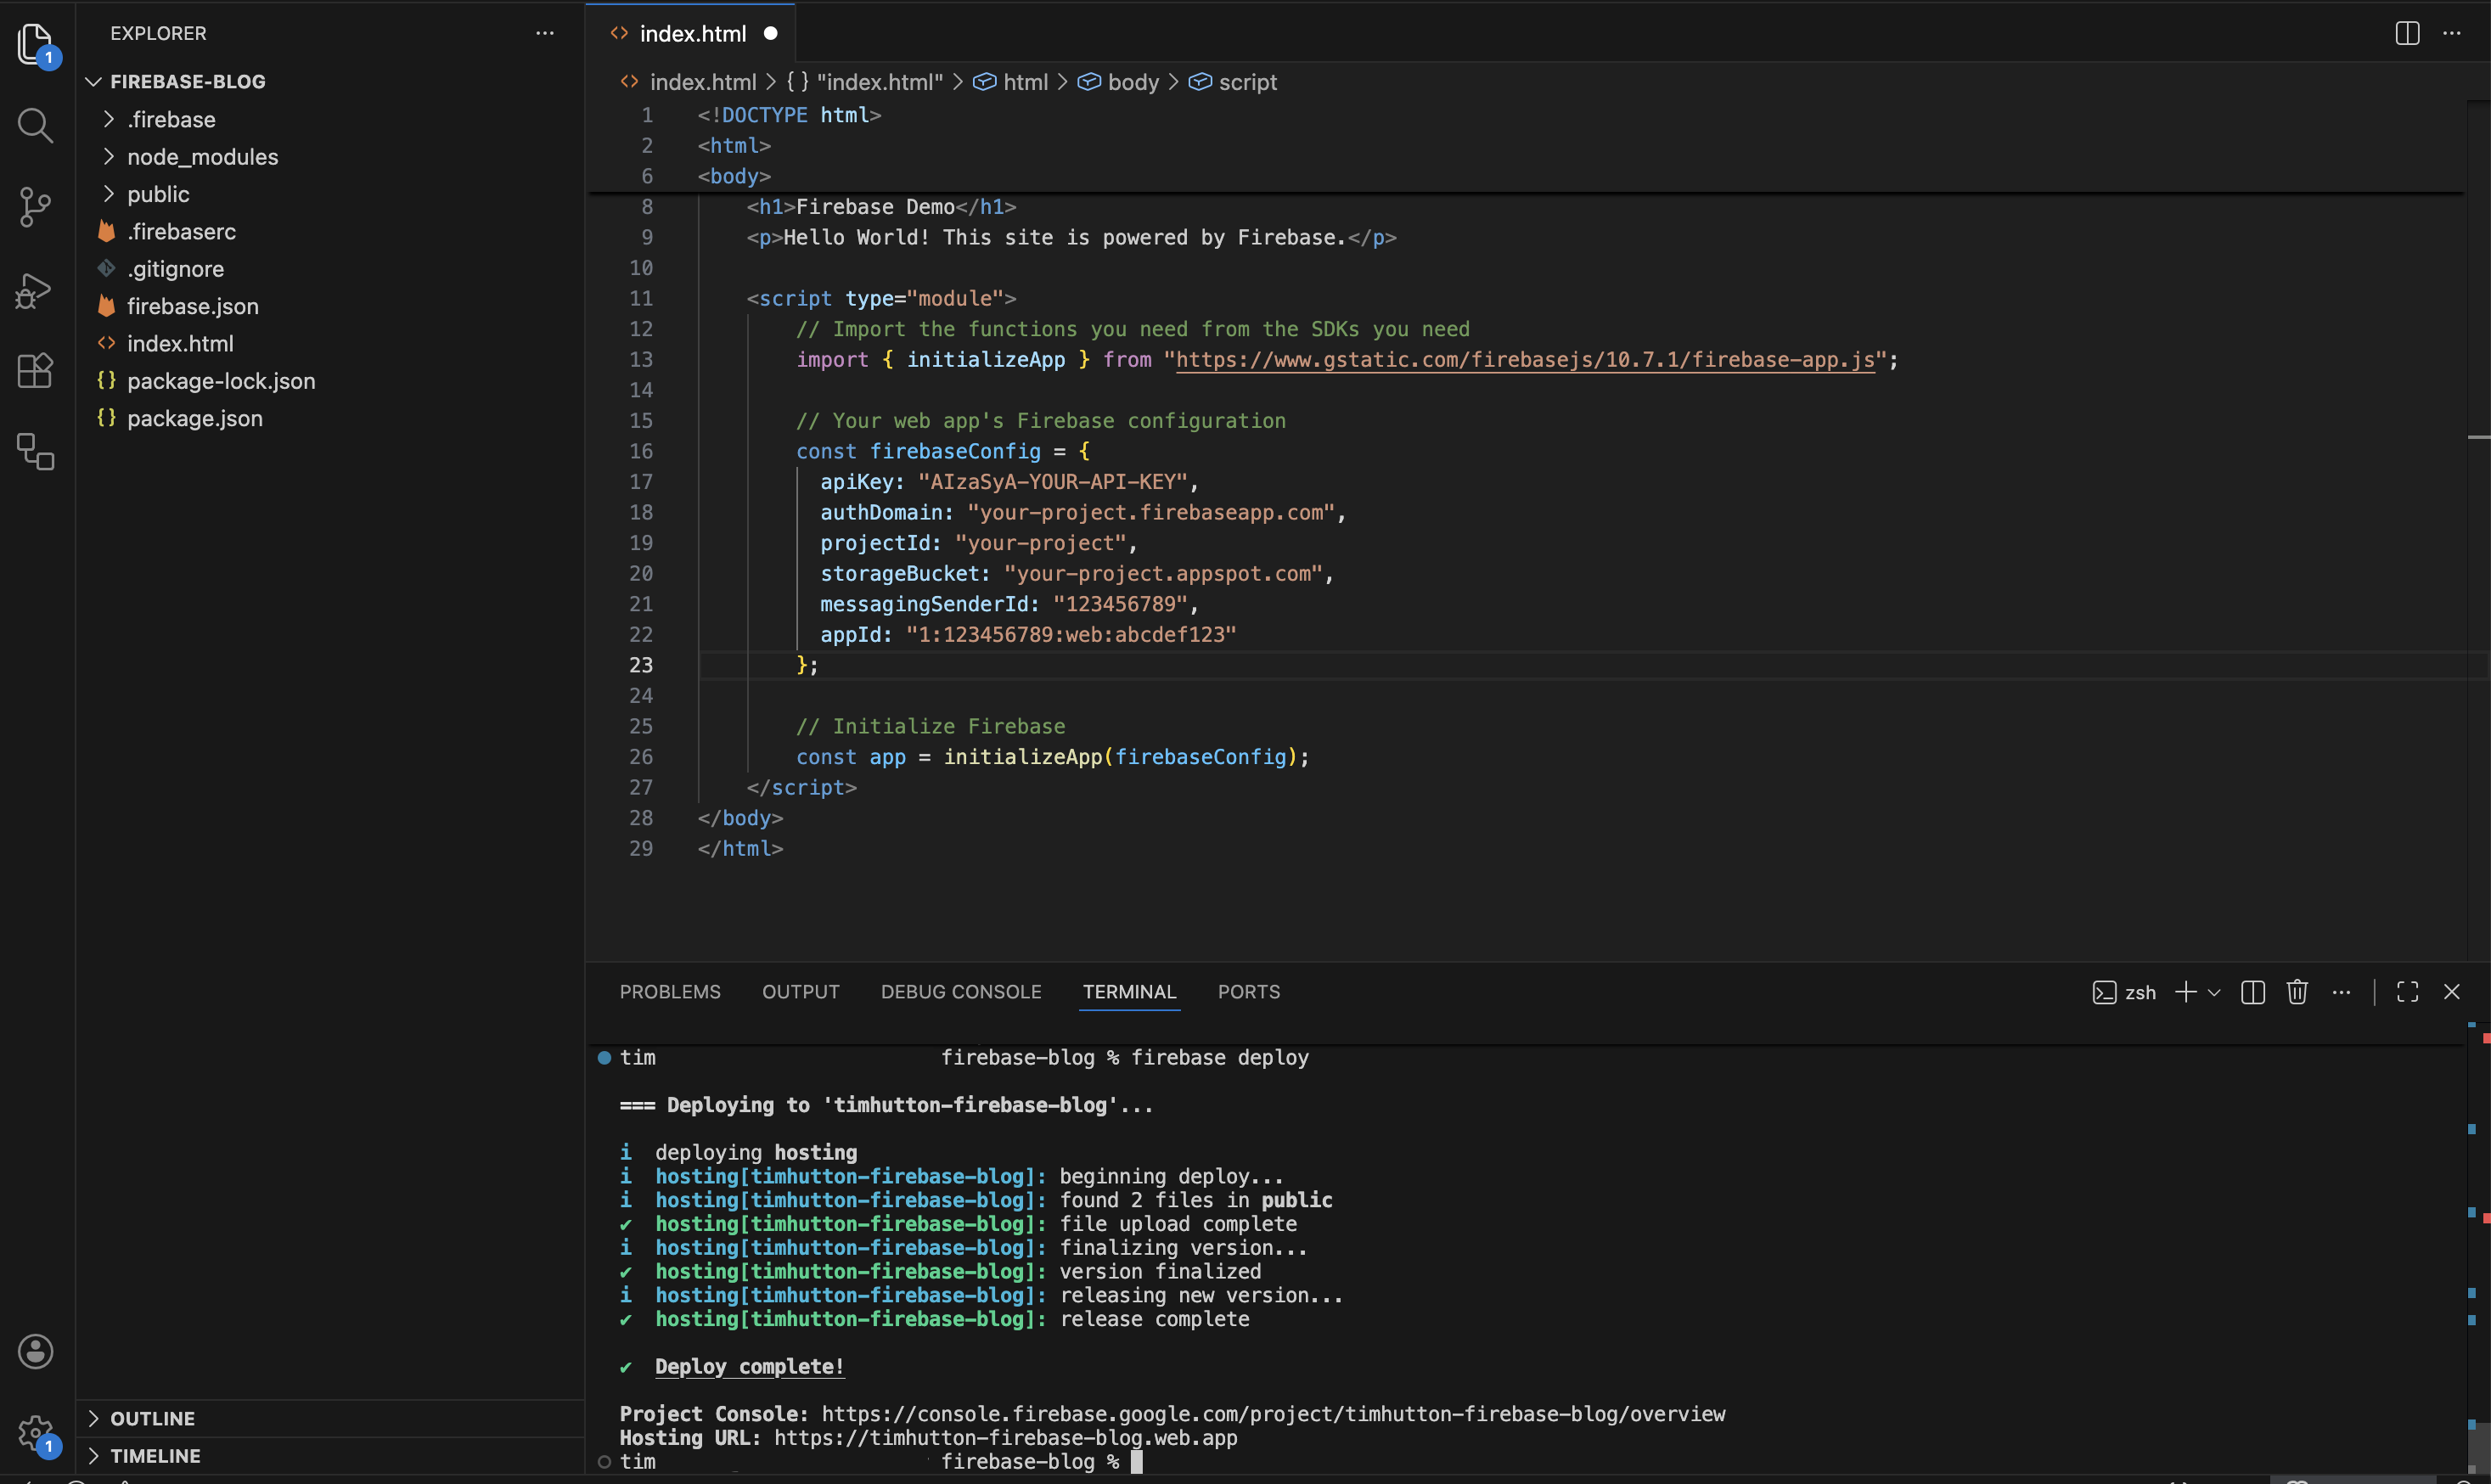
This will give you a Hosting URL such as in the image below. You can either click this or type it into your browser to see your work. Et voilà - our website is live!
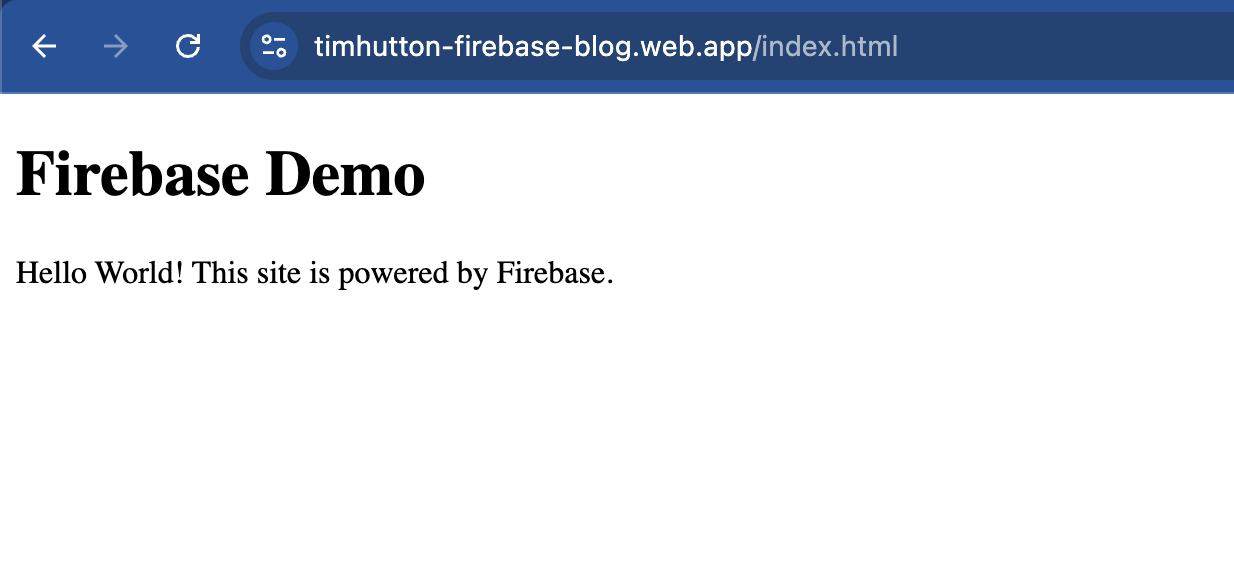
You can obviously expand on this and integrate any number of Google, or third-party, features such as Gemini into your website. The possibilities are endless!
Hopefully you found the above useful - do not hesitate to reach out with any questions. I intend on publishing more helpful Firebase guides in the near future.
Newsletter
Occasional notes on data, tracking & AI-readiness
No spam, no growth-hacking. Just an email when there's something worth reading.