
Automate Server-Side Google Tag Manager Updates on Cloud Run
In a previous article I wrote about how to update your Google Tag Manager Server-Side tagging servers, and I have since been working on how you can automate this process to ensure that your tagging infrastructure is always up to date.
Because server-side Google Tag Manager relies on a static tag (gcr.io/cloud-tagging-10302018/gtm-cloud-image:stable), the Cloud Run instance will not automatically pull updates unless you force a new deployment.
In the below guide, I take you through how to build two different types of automation for updating these tagging servers.
- Semi-Automated: An email alert system that checks for updates, alerts you, and provides a button to approve the deployment.
- Fully Automated: A hands-off weekly job that forces Cloud Run to pull the newest stable version seamlessly with zero downtime.
As a reminder, the Google Tag Manager server-side release log can be found here.
The below guide utilises SendGrid, but can, of course, be replaced by any email provider or notification system such as Slack or Microsoft Teams. You will also need to ensure that you have IAM Permissions in your Google Cloud project to create Cloud Functions, Cloud Scheduler tasks, and Secret Manager secrets.
The Semi-Automated Solution
This uses Cloud Scheduler to trigger a Cloud Function once a week - this can obviously be updated to your preferred regularity. The function checks Google’s container registry digest against your deployed version. If they mismatch, it emails you an “Approve Update” link via SendGrid.
Step 1: Secure Your SendGrid API Key
Instead of hardcoding API keys, store them securely in Google Cloud.
- Go to Secret Manager in your GCP Console - you may have to enable Secret Manager API if you have not used it previously.
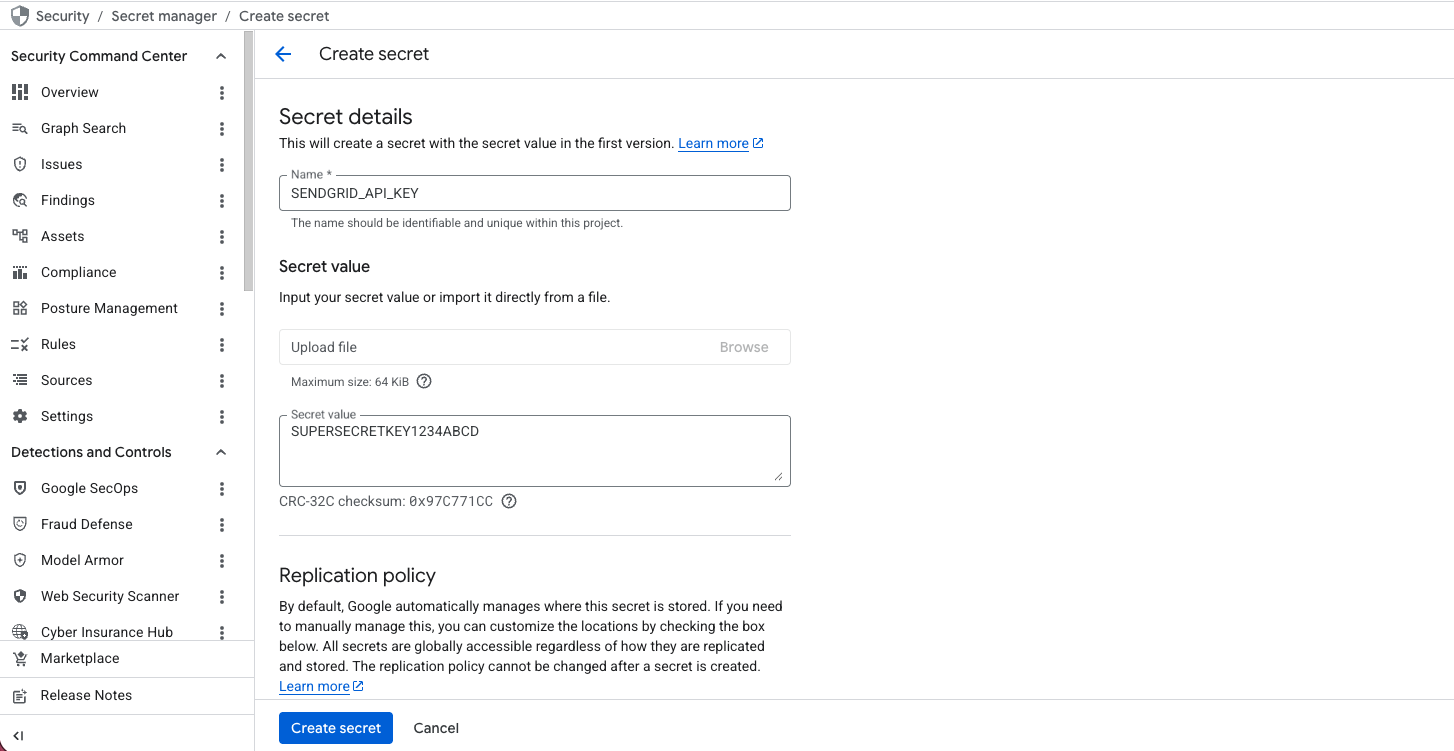
- Click Create Secret. Name it SENDGRID_API_KEY such as in the image below and paste your SendGrid API key as the value and then click Create secret. Obviously amend this step if using another provider, and amend line 10 in index.js with the name you’ve given the Secret.
- Grant your Cloud Function’s Service Account the Secret Manager Secret Accessor role. To do this, go to IAM > Service Accounts, click on the service account that has the Name of Default compute service account, select the Permissions tab, click Manage Access and add the role of Secret Manager Secret Accessor.
Step 2: Create the Check & Notify Cloud Function
- Go to Cloud Run Services and click Write a Function.
- Give the service a name, select your region and choose Node.js 22 as the runtime. Under Authentication select Require authentication and ensure Identity and Access Management (IAM) is ticked.
- You’ll need to add your environment variables and SendGrid secret. Open Containers, Networking, Security and under Edit Container click the Variables & Secrets tab. Click Add variable and paste in the following varbiables along with adding their values:
- GCP_PROJECT_ID: Your Google Cloud Project ID.
- GCP_REGION: The region where your Cloud Run instance lives (e.g., europe-west8).
- GTM_SERVICE_NAME: The name of your server-side GTM Cloud Run service.
- Then under Secrets exposed as environment variables click Reference a secret and select the Secret that you created earlier from the dropdown menu.
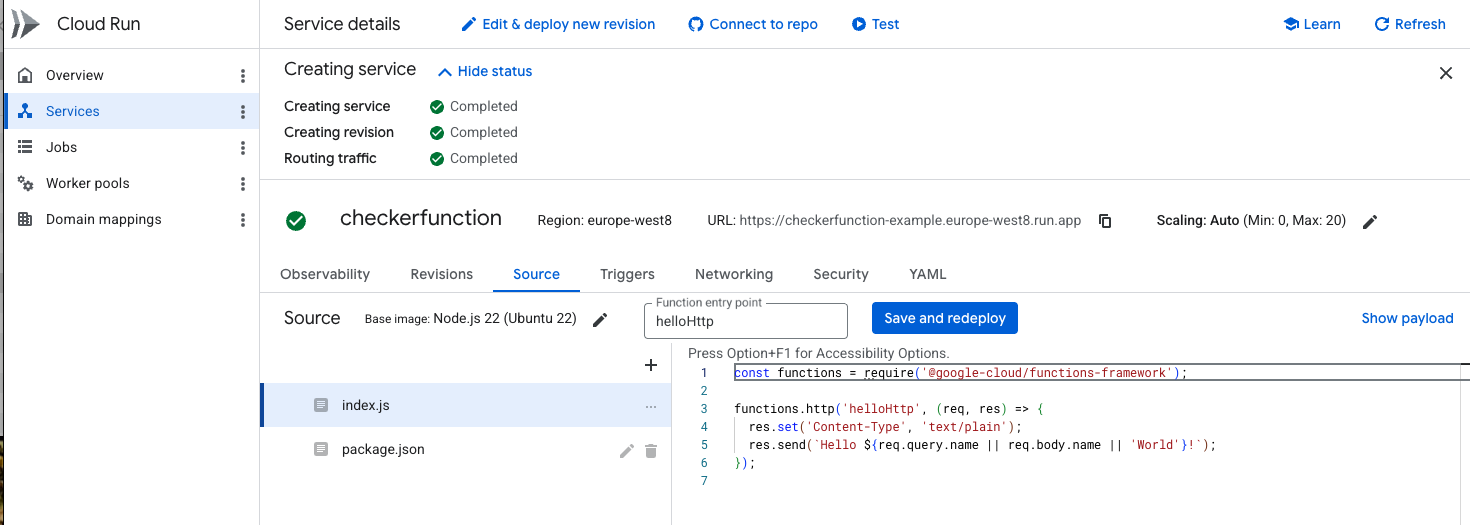
- Once done, click Create which will take you to the next step where you will be able to add your code. You should also make a note of the URL that is given to you as this will come in handy later. Use the below code for your function in the relevant package.json and index.js sections. This can also be found in Github here. Click Save and redeploy once the code is updated.
{
  "name": "sgtm-update-notifier",
  "version": "1.0.0",
  "engines": {
    "node": ">=22.0.0"
  },
  "dependencies": {
    "@google-cloud/run": "^1.3.0",
    "@sendgrid/mail": "^8.1.0",
    "axios": "^1.6.0"
  }
}
const { ServicesClient } = require('@google-cloud/run').v2;
const sgMail = require('@sendgrid/mail');
const axios = require('axios');

// Ensure that the following environment variables are set before deploying
// Also update the SEND_GRID_API_KEY to whatever name you give this in Google Cloud Secret Manager
const runClient = new ServicesClient();
sgMail.setApiKey(process.env.SENDGRID_API_KEY);

exports.checkGtmUpdate = async (req, res) => {
  try {
    // Make sure these are created before deploying!
    const projectId = process.env.GCP_PROJECT_ID;
    const region = process.env.GCP_REGION;
    const serviceName = process.env.GTM_SERVICE_NAME;

    const servicePath = `projects/${projectId}/locations/${region}/services/${serviceName}`;

    // Get current deployed image digest from Cloud Run
    const [service] = await runClient.getService({ name: servicePath });
    const currentImage = service.template.containers[0].image;

    // Fetch the latest digest for the :stable tag from Google's Registry
    // Note: This API request fetches the token and manifest registry data for the image
    const registryUrl = `https://gcr.io/v2/cloud-tagging-10302018/gtm-cloud-image/manifests/stable`;
    const registryResponse = await axios.get(registryUrl, {
      headers: { 'Accept': 'application/vnd.docker.distribution.manifest.v2+json' }
    });
    const latestDigest = registryResponse.headers['docker-content-digest'];

    // Compare current deployed signature/digest with latest registry digest
    // Cloud Run appends the digest to the image string upon deployment
    if (!currentImage.includes(latestDigest)) {
      console.log('Update available! Sending notification email...');

      // Target URL for your approval Cloud function
      const approvalUrl = process.env.APPROVAL_FUNCTION_URL;

      const msg = {
        to: process.env.ADMIN_EMAIL,
        from: process.env.SENDER_EMAIL,
        subject: 'Action Required: Server-Side GTM Update Available',
        html: `
          <p>A new version of server-side GTM is available in the Google Registry.</p>
          <p><strong>Current Image:</strong> <code>${currentImage}</code></p>
          <p><strong>Latest Digest:</strong> <code>${latestDigest}</code></p>
          <br />
          <a href="${approvalUrl}" style="background-color: #1a73e8; color: white; padding: 10px 20px; text-decoration: none; border-radius: 4px; font-weight: bold;">Approve & Deploy Update</a>
        `,
      };

      await sgMail.send(msg);
      return res.status(200).send('Update detected. Email notification sent.');
    }

    return res.status(200).send('sGTM is completely up to date.');
  } catch (error) {
    console.error('Error executing update check:', error);
    return res.status(500).send(error.toString());
  }
};
Step 3: Create the Approval Cloud Function
When you click the button in the email, it hits this second Cloud Function, which actually executes the deployment. Create another Cloud Function following the 4 steps under Step 2: Create the Check & Notify Cloud Function above, however, in your Authentication settings you can select Allow public access, and then use code below.
{
  "name": "sgtm-approval-deployer",
  "version": "1.0.0",
  "engines": {
    "node": ">=22.0.0"
  },
  "dependencies": {
    "@google-cloud/run": "^1.3.0"
  }
}
const { ServicesClient } = require('@google-cloud/run').v2;
// This client automatically uses the service account credentials attached to this Cloud Function.
const runClient = new ServicesClient();

/**
 * Triggered by HTTP GET/POST (via the link in your notification email).
 * Instructs Cloud Run to fetch the latest sGTM image and deploy a new revision.
 */
exports.deployGtmUpdate = async (req, res) => {
  try {
    // Construct the fully qualified resource name for your Cloud Run service.
    const name = `projects/${process.env.GCP_PROJECT_ID}/locations/${process.env.GCP_REGION}/services/${process.env.GTM_SERVICE_NAME}`;
    console.log(`[sGTM Bot] Fetching current configuration for service: ${name}`);

    // Fetch the existing live configuration of your Cloud Run service.
    // runClient.getService returns an array where the first element is the Service object.
    const [service] = await runClient.getService({ name });

    // Ensure the nested metadata and annotation objects exist to avoid "undefined" errors.    service.template = service.template || {};
    service.template.metadata = service.template.metadata || {};
    service.template.metadata.annotations = service.template.metadata.annotations || {};

    // Cloud Run normally won't redeploy if the image tag text string doesn't change.
    // By appending `?update=${Date.now()}` (e.g., ?update=1716300000000), we modify the configuration text.
    // This tells Cloud Run: "Something is different, go pull a fresh copy of ':stable' from the registry."
    const cacheBusterUri = `gcr.io/cloud-tagging-10302018/gtm-cloud-image:stable?update=${Date.now()}`;
    service.template.metadata.annotations['client.knative.dev/user-image'] = cacheBusterUri;

    console.log(`[sGTM Bot] Modifying configuration with cache-buster: ${cacheBusterUri}`);

    // Submit the updated configuration back to the Cloud Run API.
    // This is an asynchronous operation. GCP starts spinning up the new containers in the background.
    const [operation] = await runClient.updateService({ service });

    // The API call returns a "Long-Running Operation" object. We call .promise() to pause execution
    // of this function until the Cloud Run deployment completely finishes (or fails).
    await operation.promise();
    console.log('[sGTM Bot] Cloud Run deployment completed successfully.');

    // Success Response: This HTML is what you will see in your browser tab when you click the email link.
    res.status(200).send(`
      <div style="font-family: Arial, sans-serif; max-width: 500px; margin: 50px auto; text-align: center; border: 1px solid #d4edda; padding: 20px; border-radius: 8px; background-color: #d4edda; color: #155724;">
        <h1 style="margin-top: 0;">Deployment Success!</h1>
        <p>Your server-side GTM instance has been successfully updated to the latest stable version via a zero-downtime rolling update.</p>
      </div>
    `);

  } catch (error) {
    // Error Handling: Log the full error to GCP Cloud Logging for debugging, and show a failure screen.
    console.error('[sGTM Bot] CRITICAL: Deployment failed:', error);

    res.status(500).send(`
      <div style="font-family: Arial, sans-serif; max-width: 500px; margin: 50px auto; text-align: center; border: 1px solid #f8d7da; padding: 20px; border-radius: 8px; background-color: #f8d7da; color: #721c24;">
        <h1 style="margin-top: 0;">Deployment Failed</h1>
        <p>An error occurred while updating your sGTM instance.</p>
        <pre style="text-align: left; background: #fff; padding: 10px; border-radius: 4px; overflow-x: auto;">${error.message}</pre>
      </div>
    `);
  }
};
Step 4: Automate the Check with Cloud Scheduler
- Navigate to Cloud Scheduler and click Create Job.
- Name: weekly-sgtm-update-check
- Region: Ensure this matches the region used in your Cloud Function.
- Frequency: 0 9 * * 1 (Every Monday at 9:00 AM - this can be replaced with your preference of data/regularity).
- Target type: HTTP.
- URL: Enter the URL from the Cloud Function we created earlier for the Check & Notify Cloud Function (the first function we created).
- Auth header: Add OIDC token and select your service account. Once done, click Create.
The Automated Solution
If you prefer to skip the manual approval email entirely, you can simply force Cloud Run to redeploy the :stable image on a recurring schedule. Cloud Run natively uses rolling deployments, meaning it spins up a healthy updated container before shutting down the old container. Your tracking tracking scripts experience zero downtime.
Step 1: Create the Auto-Deploy Cloud Function
Create a new Cloud Function following the same steps we used earlier under Create the Check & Notify Cloud Function, including setting Authentication to Require authentication and ensuring Identity and Access Management (IAM) is ticked. You do not have to add the SendGrid secret step, however, as we are not using any emails in this process.
Once done, click Create and paste the below code into the relevant files and then deploy. Again, make a note of the URL that is created by the Function as you will need this later.
{
  "name": "sgtm-auto-updater",
  "version": "1.0.0",
  "engines": {
    "node": ">=22.0.0"
  },
  "dependencies": {
    "@google-cloud/run": "^1.3.0"
  }
}
const { ServicesClient } = require('@google-cloud/run').v2;
const runClient = new ServicesClient();

exports.autoUpdateGtm = async (req, res) => {
  try {
    // Your relevant Google Cloud variables - ensure that these are configured before deploying!
    const projectId = process.env.GCP_PROJECT_ID;
    const region = process.env.GCP_REGION;
    const serviceName = process.env.GTM_SERVICE_NAME;

    // Construct the resource identifier required by the GCP API
    const name = `projects/${projectId}/locations/${region}/services/${serviceName}`;

    // Fetch current Cloud Run configurations
    console.log(`[sGTM Bot] Fetching current service configuration for: ${serviceName}...`);
    const [service] = await runClient.getService({ name });

    // Ensure the nested metadata maps exist in the configuration tree to prevent undefined reference errors
    service.template = service.template || {};
    service.template.metadata = service.template.metadata || {};
    service.template.metadata.annotations = service.template.metadata.annotations || {};

    // Inject a timestamp to invalidate the container configuration cache.
    // This forces Cloud Run to pull down a fresh slice of the ":stable" tag image.
    const cacheBusterUri = `gcr.io/cloud-tagging-10302018/gtm-cloud-image:stable?update=${Date.now()}`;
    service.template.metadata.annotations['client.knative.dev/user-image'] = cacheBusterUri;

    // Push configuration update to GCP
    console.log('[sGTM Bot] Initiating zero-downtime rolling update deployment...');
    const [operation] = await runClient.updateService({ service });

    // Wait for deployment completion
    await operation.promise();

    console.log('[sGTM Bot] Server-side GTM updated smoothly to the newest stable release!');
    return res.status(200).send('sGTM successfully updated.');
  } catch (error) {
    // Log errors directly to Google Cloud Logging for alerts and troubleshooting
    console.error('[sGTM Bot] CRITICAL: Failed to auto-update sGTM:', error);
    return res.status(500).send(`Auto-update failed: ${error.message}`);
  }
};
Step 2: Link to Cloud Scheduler
- Open Cloud Scheduler and click Create Job - following the same steps we have referenced under Automate the Check with Cloud Scheduler.
- Set frequency to 0 4 * * 2 (this example is every Tuesday at 4:00 AM, a low-traffic window and can, of course, be changed).
- Set Target to HTTP, paste the URL of your function we just created, and use an OIDC Token for secure authentication.
Verifying the Deployment
Once configured, you can test either solution manually:
- Go to Cloud Scheduler and click Force Run on your job.
- Monitor your Cloud Logging tabs. If using Option 1, you will see incoming webhook alerts or confirmation emails. If using Option 2, you will immediately notice a new revision spin up in your Cloud Run Dashboard under “Revisions”.
That’s it - one less job to do! Hopefully you found the above useful - do not hesitate to reach out with any questions.
Newsletter
Occasional notes on data, tracking & AI-readiness
No spam, no growth-hacking. Just an email when there's something worth reading.